<?xml version="1.0" encoding="UTF-8"?>
<feed xmlns="http://www.w3.org/2005/Atom">
	<title>Spike's Technology Blog</title>
	<link href="http://spikesnell.com/atom.php" rel="self" />
	<link href="http://spikesnell.com/" />
	<id>http://spikesnell.com/index.php</id>
	<updated>2026-04-16T05:57:09Z</updated>
	<author>
		<name></name>
		<email></email>
	</author>
	<entry>
		<title>Quinary LED Art Clock</title>
		<link href="http://spikesnell.com/index.php?entry=entry201011-213034" />
		<link rel="alternate" type="text/html" href="http://spikesnell.com/index.php?entry=entry201011-213034" />
		<link rel="edit" href="http://spikesnell.com/index.php?entry=entry201011-213034" />
		<id>http://spikesnell.com/index.php?entry=entry201011-213034</id>
		<summary type="html"><![CDATA[<img src="images/quinary.jpg" width="480" height="643" alt="" /><br /><br />This quinary ( base 5 ) LED clock project has taken me many more months than I thought it would. I spent a great deal of time considering and ruminating over exactly how I wanted it to look and operate. It&#039;s gone through many, many, many iterations but is finally in a &#039;done&#039; enough state that I feel quite happy with it and ready to write about it and possibly move on to other things in my life. <br /><br />It began first with the concept of utilizing addressable ws2812b LED strips to indicate the time in an alternate base. I&#039;ve worked on binary clocks a few times in the past but have grown a little tired of the concept, and I wanted to create something that would make more efficient use of fewer LEDs so that I could power them directly from an esp8266 without worrying about drawing too much power from the board itself and burning it out. I like the simplicity of not providing additional current, and I wanted to see how much utility I could sneak out of these power limitations. <br /><br />I also spent at least a few weeks determining what base to use. I was thinking about base 3, and base 8 for most of that time. What finally drew me to base 5 was when I started calculating out how many LEDs it would take to convey the number 24 ( For max hours in military time ). It takes exactly 2 LEDs to do this which I found to be perfectly succinct. Then, after realizing that 3 additional LEDs would easily allow me to show every minute value up to 59 it seemed strikingly elegant that the number of LEDs required to display both the hours and minutes ( 5 total ) was the same as the base I was using. This part of the project strangely seemed to design itself. It just felt right for the clock to be configured in this way. The more I thought about it, the more I realized that it was something I had to bring into existence as a functional art piece. <br /><br />The next step was determining what colors should indicate the digits 4 through 0. What made the most sense to me was to use at least Red Green and Blue in that order. With Red being the most significant value of 4, Green being 3, and Blue as 2. I still needed to choose a value for 1, and since I like the color Purple I decided to go with that. The biggest challenge of choosing the digit colors was what to do with the digit 0. One option is to leave the LED off to indicate 0&#039;s, but in my experience with my binary clocks, I&#039;ve found that having at least some amount of light on this digit can be very useful for reading these sorts of displays in the dark. I originally went with the color Orange, because I liked that the first letter of the color looked like the digit it represents. Although, in practice with the particular LED strips I have, I found it more easily discernible to use a dim Yellow for 0&#039;s. So the way I think about the final colorset is as RGBPY, or Red, Green, Blue, Purple, Yellow. The clock made a lot more sense to me after I committed these color/digit pairs to memory and I can now readily associate the colors I chose with the digit values that they represent.<br /><br />
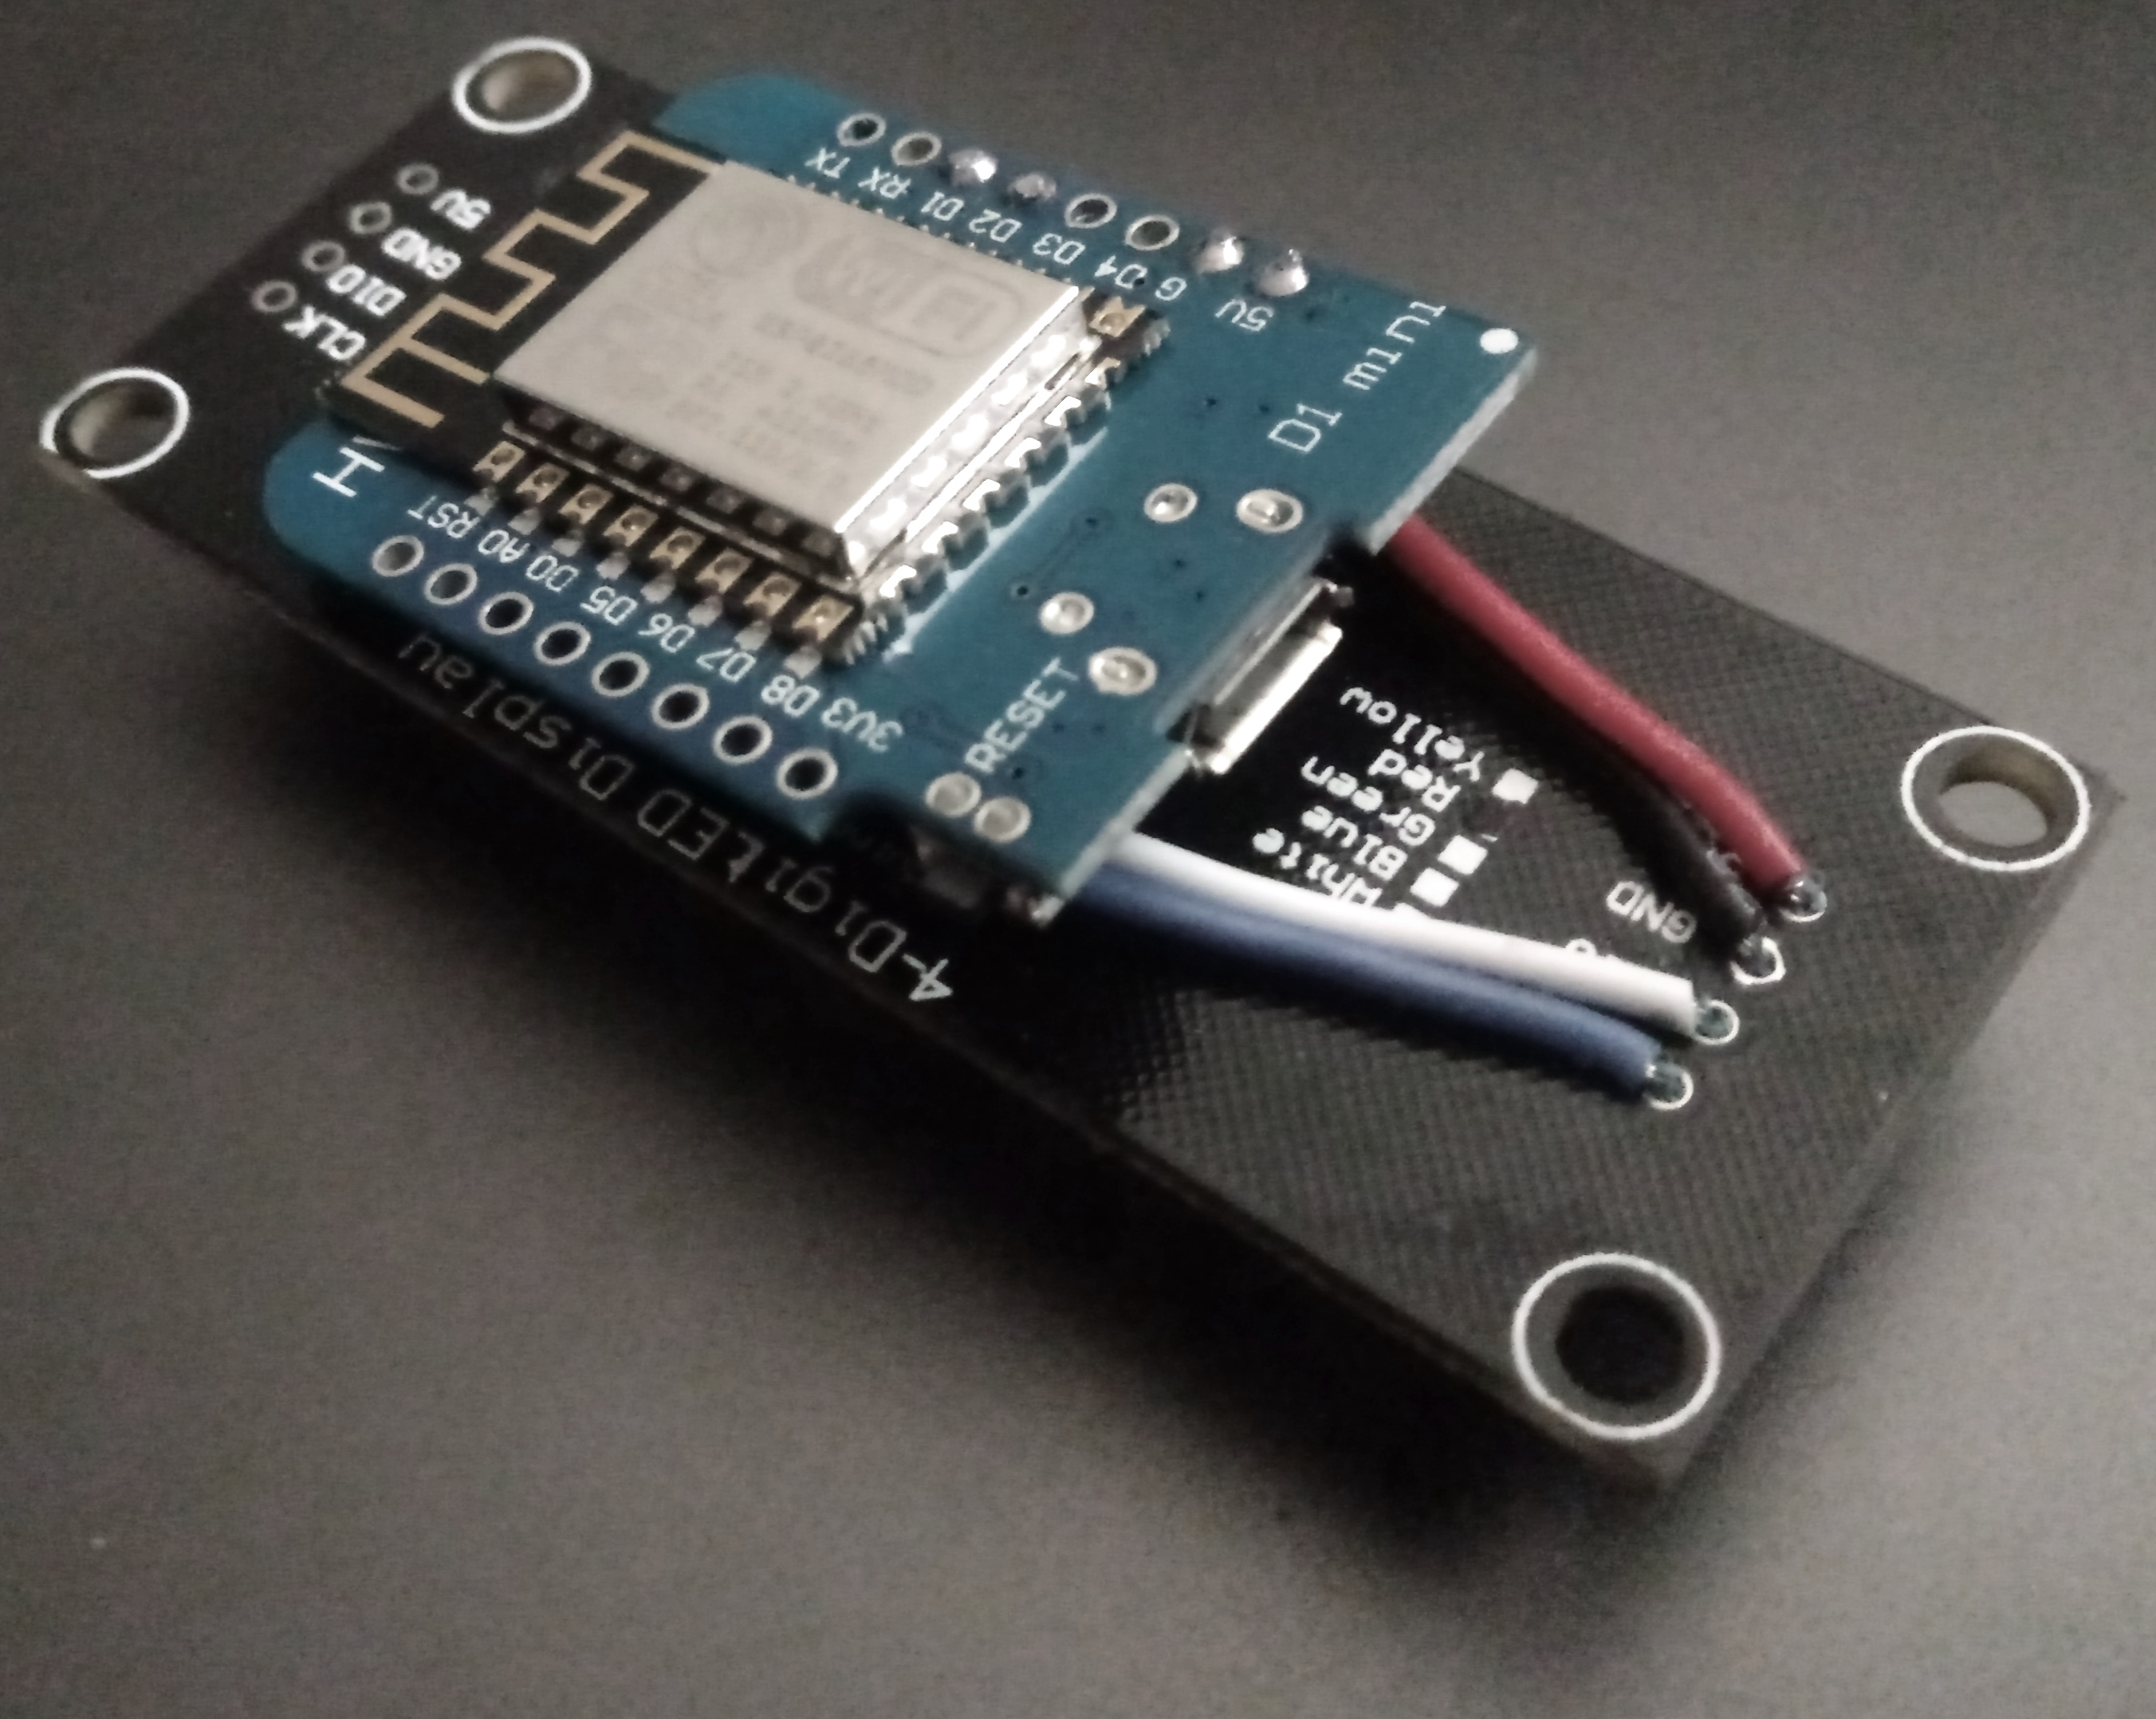
The coding of this project is the part that took the least amount of time. I was able to re-use much of the code that I have used for previous esp8266 projects, although I did spend a couple of nights after work to make the code cleaner by moving certain parts of it to self-contained helper functions. The time setting portion is handled automatically using Network Time Protocol, so the esp8266 hops onto my local WIFI router and retrieves the current local time from the internet. It also syncs up with the NTP server regularly so that there isn&#039;t much drift. I wrote a helper function to account for daylight savings time, so that unlike with my other clock projects, I won&#039;t have to reflash the code twice a year for it to remain accurate. The settings for timezone, daylight savings time, the colorset, and everything else are defined in adjustable values up near the top of the code so that they can be adjusted easily by someone else ( Or more likely, me years from now ). <br /><br />The final nicety with the code is that at 8 pm every night it turns the brightness down quite a bit so that the LEDs don&#039;t garishly illuminate a dark room. After 8 am the clock sets its brightness back to daytime mode. The full code can be <a href="quinaryClock.7z" >downloaded here</a>, and the meat of it follows below:<br /><pre>// Quinary RGBPY LED Clock<br />// Spike Snell 2020<br />//<br />// Add ESP8266 board from <a href="https://arduino.esp8266.com/stable/package_esp8266com_index.json" >https://arduino.esp8266.com/stable/package_esp8266com_index.json</a> <br />// ( File &gt; Preferences, Tools &gt; Board &gt; Board Manager )<br /><br />#include &lt;NTPClient.h&gt;     // <a href="https://github.com/taranais/NTPClient" >https://github.com/taranais/NTPClient</a><br />#include &lt;FastLED.h&gt;       // <a href="https://github.com/FastLED/FastLED" >https://github.com/FastLED/FastLED</a><br />#include &lt;ESP8266WiFi.h&gt;<br />#include &lt;WiFiUdp.h&gt;<br /><br />// Define the number of leds<br />#define NUM_LEDS 5<br /><br />// Define the data pin<br />#define DATA_PIN 4<br /><br />// Set up the character arrays for the Wifi ssid and password<br />const char *ssid     = &quot;********&quot;;<br />const char *password = &quot;********&quot;;<br /><br />// Define the UTC Time offsets, these are for Central time in North America<br />const long winterOffset = -21600;<br />const long summerOffset = -18000;<br /><br />// Define the DST Start and end Months and Days<br />const int dstMonthStart = 3;<br />const int dstDayStart   = 8;<br />const int dstMonthEnd   = 11;<br />const int dstDayEnd     = 1;<br /><br />// Define the bright and dim light intensity 0 - 255<br />const int bright = 88;<br />const int dim    = 15;<br /><br />// Define the hour that daylight roughly starts and ends<br />const int hourDayStarts = 8;<br />const int hourDayEnds   = 20;<br /><br />// Define the led digit colors<br />uint32_t color[] = {<br />  0x151000,        // 0, Dim Yellow<br />  0xAA00AA,        // 1, Purple<br />  0x0000FF,        // 2, Blue<br />  0x005500,        // 3, Green<br />  0xFF0000         // 4, Red<br />};<br /><br />// Define NTP Client to get the time<br />WiFiUDP ntpUDP;<br /><br />// Set up the Network Time Protocol Client, update with fresh time every 10 minutes<br />NTPClient timeClient(ntpUDP, &quot;85.21.78.23&quot;, winterOffset, 600000);<br /><br />// Set up the leds array<br />CRGB leds[NUM_LEDS];<br /><br />// Setup our sketch<br />void setup() {<br /><br />    // Connect to the wifi point<br />    WiFi.begin(ssid, password);<br /><br />    // Wait for the wifi to be connected<br />    while ( WiFi.status() != WL_CONNECTED ) {<br />        delay(500);<br />    }<br /><br />    // Start the time client<br />    timeClient.begin();<br /><br />    // Add the leds array to the Fast Led Definition<br />    FastLED.addLeds&lt;NEOPIXEL, DATA_PIN&gt;(leds, NUM_LEDS);<br />    <br />}<br /><br />// Loop through this part every second<br />void loop() {<br /><br />    // Update the time client to get the current time<br />    timeClient.update();<br /> <br />    // Adjust for daylight savings time<br />    adjustDst();<br /><br />    // Parse the current time and prepare all the led colors<br />    parseTime();<br />    <br />    // Show all the leds<br />    FastLED.show();<br /><br />    // Wait for 1 second<br />    delay(1000);<br />    <br />}<br /><br />// Adjust for daylight savings time considerations<br />void adjustDst() {<br /><br />    // Extract date<br />    String formattedDate = timeClient.getFormattedDate();<br /><br />    // Get the current month string<br />    String month = formattedDate.substring(5, 7);<br /><br />    // Get the current day string<br />    String day   = formattedDate.substring(8,10);<br /><br />    // If we are within the defined daylight savings time period<br />    if ( (month.toInt() &gt;  dstMonthStart &amp;&amp; month.toInt() &lt; dstMonthEnd)      ||<br />         (month.toInt() == dstMonthStart &amp;&amp; day.toInt()   &gt; dstDayStart - 1)  || <br />         (month.toInt() == dstMonthEnd   &amp;&amp; day.toInt()   &lt; dstDayEnd)        ){<br /><br />        // Set summer time<br />        timeClient.setTimeOffset(summerOffset);<br />        <br />    }<br /><br />    // Else we must not be in daylight savings time<br />    else {<br />      <br />        // Set winter time<br />        timeClient.setTimeOffset(winterOffset);<br />      <br />    }<br />  <br />}<br /><br />// Parse the current time and prepare all the led colors<br />void parseTime() {<br /><br />    // Create our character buffers<br />    char timeBuffer[5];<br />    char minuteBuffer[3];<br />    char tempHourBuffer[2];<br />    char tempMinuteBuffer[3];<br /><br />    // Set the leds bright if during the daytime<br />    if ( timeClient.getHours() &gt; hourDayStarts - 1 &amp;&amp; timeClient.getHours() &lt; hourDayEnds ) {<br /><br />        // Set leds to bright mode <br />        FastLED.setBrightness(bright); <br />      <br />    }<br /><br />    // Else set the led&#039;s to be dim because it is nighttime<br />    else {<br /><br />        // Set leds to dim mode <br />        FastLED.setBrightness(dim); <br />      <br />    }<br /><br />    // Convert the current hours to base 5<br />    itoa(timeClient.getHours(),tempHourBuffer,5);<br /><br />    // Convert the current minutes to base 5<br />    itoa(timeClient.getMinutes(),tempMinuteBuffer,5);<br /><br />    // Pad 0&#039;s to the hour buffer and place it on the timeBuffer<br />    sprintf( timeBuffer, &quot;%02s&quot;, tempHourBuffer );<br /><br />    // Pad 0&#039;s onto the tempMinuteBuffer and place it on minuteBuffer<br />    sprintf( minuteBuffer, &quot;%03s&quot;, tempMinuteBuffer );<br /><br />    // Concatenate the timeBuffer and minuteBuffer<br />    strcat(timeBuffer, minuteBuffer);<br /><br />    // Iterate over the timeBuffer and set all the leds<br />    for (int i = 0; i &lt; strlen(timeBuffer); i++) {<br />      <br />        // Switch on the2 current timeBuffer digit and set each led&#039;s color<br />        switch(timeBuffer[ i ]) {<br />            case &#039;0&#039; :<br />                leds[ i ] = color[0];<br />                break;     <br />            case &#039;1&#039; :<br />                leds[ i ] = color[1];<br />                break;   <br />            case &#039;2&#039; :<br />                leds[ i ]= color[2];<br />                break;   <br />            case &#039;3&#039; :<br />                leds[ i ] = color[3];<br />                break;   <br />            default :<br />                leds[ i ] = color[4];     <br />        }<br /><br />    }<br />  <br />}</pre>Another part of this project that took quite a bit of time was determining how I wanted to arrange and display the LEDs physically. I&#039;ve had a lot of prototypes, from just the LED strip laid out loose, or on a strip of cardboard, to putting them on popsicle sticks. My current favorite version is where I have eliminated the LED strip and wired individual nanopixels directly into a strip of pegboard that I painted black. With a little bit of hot glue smushed into the pegboard holes ( and then roughed up a bit with a nail ) very pleasing diffused colors can be generated.<br /><br />I&#039;ve had one of these quinary clocks in place prominently in my living room for so long now that it is starting to feel less like a novelty and has instead become a permanent function of the wall itself. It is one of the main clocks that I look to throughout the day to determine what time it is. I&#039;ve had people see it many times without realizing that it was a clock who were subsequently astonished when inquiring and finding out its secret use. The clock comes across much like an amorphous colorful art installation if you don&#039;t know what it is. But, when you start explaining that it is a timepiece and how to read it, that is when they start looking at you like you&#039;re a little crazy. Luckily, my girlfriend is also interested in programming and computer science, so she was able to start reading the new clock pretty naturally within a couple of days.<br /><br />I strongly like this quinary clock. It turned out a lot more elegant than I first imagined it would, and it has become a visually intriguing yet useful part of my living environment that I would very much miss if absent. Unlike most of the other projects that I set up, have fun with for a few weeks, and then set aside, I feel confident that this one will be staying up indefinitely.]]></summary>
		<updated>2020-10-11T21:30:34Z</updated>
	</entry>
	<entry>
		<title>Wifi NTP Clock ( ESP8266 with TM1637 )</title>
		<link href="http://spikesnell.com/index.php?entry=entry200405-225812" />
		<link rel="alternate" type="text/html" href="http://spikesnell.com/index.php?entry=entry200405-225812" />
		<link rel="edit" href="http://spikesnell.com/index.php?entry=entry200405-225812" />
		<id>http://spikesnell.com/index.php?entry=entry200405-225812</id>
		<summary type="html"><![CDATA[<img src="d1Time.jpg" width="480" height="276" alt="" /><br /><br />My latest passion project incorporates a cheap Wemos D1 Mini clone board ( ~2$ each on eBay ) with integrated wifi along with a TM1637 4-Digit Led display module  ( ~ $1 each ) to create an incredibly accurate self-adjusting wifi clock. I had previously been using 4-Digit displays by individually addressing all the necessary inputs, but it takes a whole ratking of wires to do that and the cost savings are negligible compared to the TM1637 modules that can be found overseas.<br /><br />The Wemos D1 Mini clones have become my go-to board for projects like these both because of their low cost and versatility. The Digispark boards I sometimes use still have them beat on price, but only by about 60 cents or so, and those don&#039;t have wifi so they wouldn&#039;t be suitable for this project.<br /><br /><a href="InternetTime.7z" >The code</a> is very straightforward after all the necessary board and module libraries are gathered and can be found below:<pre>// Add ESP8266 board from <a href="https://arduino.esp8266.com/stable/package_esp8266com_index.json" >https://arduino.esp8266.com/stable/package_esp8266com_index.json</a> ( File &gt; Preferences, Tools &gt; Board &gt; Board Manager )<br /><br />#include &lt;TM1637Display.h&gt; // <a href="https://github.com/avishorp/TM1637" >https://github.com/avishorp/TM1637</a>  <br />#include &lt;NTPClient.h&gt;     // <a href="https://github.com/arduino-libraries/NTPClient" >https://github.com/arduino-libraries/NTPClient</a><br />#include &lt;ESP8266WiFi.h&gt;<br />#include &lt;WiFiUdp.h&gt;<br /><br />// Set up the character arrays for the Wifi ssid and password<br />const char *ssid     = &quot;********&quot;;<br />const char *password = &quot;********&quot;;<br /><br />// Set the UTC Time offset in seconds<br />// const long utcOffsetInSeconds = -21600;<br />const long utcOffsetInSeconds = -18000;<br /><br />// Define NTP Client to get the time<br />WiFiUDP ntpUDP;<br /><br />// Set up the Network Time Protocol Client, update with fresh time every 10 minutes<br />NTPClient timeClient(ntpUDP, &quot;85.21.78.23&quot;, utcOffsetInSeconds, 600000);<br /><br />// Module connection pins (Digital Pins)<br />#define CLK 5<br />#define DIO 4   <br /><br />// Set up the TM1637 Display<br />TM1637Display display(CLK, DIO);<br /><br />void setup() {<br />  <br />    // Set the brightness of the display ( 0xff is brightest )<br />    display.setBrightness(0x1a);<br /><br />    // Connect to the wifi point<br />    WiFi.begin(ssid, password);<br /><br />    // Wait for the wifi to be connected<br />    while ( WiFi.status() != WL_CONNECTED ) {<br />        delay(500);<br />    }<br /><br />    // Start the time client<br />    timeClient.begin();<br />  <br />}<br /><br />void loop() {  <br /><br />    // Update the time client to get the current time<br />    timeClient.update();<br /><br />    // Display the hours<br />    display.showNumberDecEx(timeClient.getHours(), 0b11100000, true, 2, 0);<br /><br />    // Display the minutes<br />    display.showNumberDecEx(timeClient.getMinutes(), 0b11100000, true, 2, 2);<br />  <br />}</pre>I&#039;m running it without an enclosure but have carefully soldered the necessary wires in place on the back of the board and then have hot-glued the whole assembly together such that the front-facing side of the clock fully obscures the D1 Mini behind it:<br /><br /><img src="d1TimeBack.jpg" width="480" height="383" alt="" /><br /><br />The mounting holes on the 4-Digit display make for easy attaching to the wall with push pins, but the unit can also just be set by itself on a desk because it is self-supporting. It consumes little power, and I&#039;ve run it successfully on some portable battery packs for many days. Most of the time I leave it nestled into a piece of driftwood in the bedroom. <br /><br />I initially ran into an issue where the time would sometimes stop getting set and start to drift. I was able to correct this by using the specific IP address of the NTP ( Network Time Protocol ) server I like best, instead of relying on a DNS to get the IP for me. I suspect that after enough reconnects the DNS handler stops working correctly and causes the library I&#039;m using to fail after enough attempts. Since changing to a set IPv4 address I&#039;ve had no issues with the clock at all and have found it to be extremely accurate even when running for many months in a row. <br /><br />The real beauty of this project is its simplicity. Plug in the clock, it sets itself, you&#039;re done. Altogether the cost of all wires, hotglue, solder, and modules for this project is well below $4. A future improvement I&#039;d like to make to this would be to more intelligently handle daylight savings time because right now the board has to be re-flashed every time that this is in effect. <br /><br />Comments are very much welcome. ]]></summary>
		<updated>2020-04-05T22:58:12Z</updated>
	</entry>
	<entry>
		<title>Morse Code Tao Te Ching Flashing on the Arduino</title>
		<link href="http://spikesnell.com/index.php?entry=entry190831-174457" />
		<link rel="alternate" type="text/html" href="http://spikesnell.com/index.php?entry=entry190831-174457" />
		<link rel="edit" href="http://spikesnell.com/index.php?entry=entry190831-174457" />
		<id>http://spikesnell.com/index.php?entry=entry190831-174457</id>
		<summary type="html"><![CDATA[<img src="morseTao/tao.gif" width="456" height="368" alt="" /><br /><br />This year I have been experimenting quite a bit with the Arduino platform. I love how Arduino clones are much cheaper than Raspberry Pi’s and only cost me around 2 dollars each from China. Arduinos also consume very little power and run for many days on my rechargeable external battery packs.<br /><br />Long ago I created a blinking morse code light on a Raspberry Pi which slowly flashed the Tao Te Ching. It was a relatively straightforward process as there is far more than enough storage available on virtually any Micro Sd card to hold even the largest of books. <br /> <br />My first true Arduino project was to remake my morse code Tao Te Ching light. Getting the Arduino to flash morse code was straightforward and lots of people have worked up examples that got me started. I made many modifications to some code I found online, and eventually got the Litany Against Fear from Dune to flash out on a small white LED:<br /><br /><pre>// Message<br />byte m[] = &quot;I MUST NOT FEAR. FEAR IS THE MIND-KILLER. FEAR IS THE LITTLE-DEATH THAT BRINGS TOTAL OBLITERATION. I WILL FACE MY FEAR. I WILL PERMIT IT TO PASS OVER ME AND THROUGH ME. AND WHEN IT HAS GONE PAST I WILL TURN THE INNER EYE TO SEE ITS PATH. WHERE THE FEAR HAS GONE THERE WILL BE NOTHING. ONLY I WILL REMAIN.&quot;;<br /><br />// Pin to flash<br />int pin = 13;<br /><br />// Tempo<br />// 240 ~5wpm<br />// 120 ~10wpm<br />// 80 ~15wpm<br />int t = 240;<br /><br />// Setup the output pin<br />void setup () {<br /> pinMode(pin, OUTPUT);<br />}<br /><br />// Perform the dits<br />void d() {<br /> digitalWrite(pin, HIGH);<br /> delay(1 * t);<br /> digitalWrite(pin, LOW);<br /> delay(1 * t);<br />}<br /><br />// Perform the das<br />void da() {<br /> digitalWrite(pin, HIGH);<br /> delay(3 * t);<br /> digitalWrite(pin, LOW);<br /> delay(1 * t);<br />}<br /><br />// Define the pattern of dits and das for each letter<br />void morse(byte l) {<br /> if (l == &#039;A&#039; or l == &#039;a&#039;) {d(); da();}<br /> else if (l == &#039;B&#039; or l == &#039;b&#039;) {da(); d(); d(); d();}<br /> else if (l == &#039;C&#039; or l == &#039;c&#039;) {da(); d(); da(); d();}<br /> else if (l == &#039;D&#039; or l == &#039;d&#039;) {da(); d(); d();}<br /> else if (l == &#039;E&#039; or l == &#039;e&#039;) {d();}<br /> else if (l == &#039;F&#039; or l == &#039;f&#039;) {d(); d(); da(); d();}<br /> else if (l == &#039;G&#039; or l == &#039;g&#039;) {da(); da(); d();}<br /> else if (l == &#039;H&#039; or l == &#039;h&#039;) {d(); d(); d(); d();}<br /> else if (l == &#039;I&#039; or l == &#039;i&#039;) {d(); d();}<br /> else if (l == &#039;J&#039; or l == &#039;j&#039;) {d(); da(); da(); da();}<br /> else if (l == &#039;K&#039; or l == &#039;k&#039;) {da(); d(); da();}<br /> else if (l == &#039;L&#039; or l == &#039;l&#039;) {d(); da(); d(); d();}<br /> else if (l == &#039;M&#039; or l == &#039;m&#039;) {da(); da();}<br /> else if (l == &#039;N&#039; or l == &#039;n&#039;) {da(); d();}<br /> else if (l == &#039;O&#039; or l == &#039;o&#039;) {da(); da(); da();}<br /> else if (l == &#039;P&#039; or l == &#039;p&#039;) {d(); da(); da(); d();}<br /> else if (l == &#039;Q&#039; or l == &#039;q&#039;) {da(); da(); d(); da();}<br /> else if (l == &#039;R&#039; or l == &#039;r&#039;) {d(); da(); d();}<br /> else if (l == &#039;S&#039; or l == &#039;s&#039;) {d(); d(); d();}<br /> else if (l == &#039;T&#039; or l == &#039;t&#039;) {da();}<br /> else if (l == &#039;U&#039; or l == &#039;u&#039;) {d(); d(); da();}<br /> else if (l == &#039;V&#039; or l == &#039;v&#039;) {d(); d(); d(); da();}<br /> else if (l == &#039;W&#039; or l == &#039;w&#039;) {d(); da(); da();}<br /> else if (l == &#039;X&#039; or l == &#039;x&#039;) {da(); d(); d(); da();}<br /> else if (l == &#039;Y&#039; or l == &#039;y&#039;) {da(); d(); da(); da();}<br /> else if (l == &#039;Z&#039; or l == &#039;z&#039;) {da(); da(); d(); d();}<br /> else if (l == &#039;1&#039;) {d(); da(); da(); da(); da();}<br /> else if (l == &#039;2&#039;) {d(); d(); da(); da(); da();}<br /> else if (l == &#039;3&#039;) {d(); d(); d(); da(); da();}<br /> else if (l == &#039;4&#039;) {d(); d(); d(); d(); da();}<br /> else if (l == &#039;5&#039;) {d(); d(); d(); d(); d();}<br /> else if (l == &#039;6&#039;) {da(); d(); d(); d(); d();}<br /> else if (l == &#039;7&#039;) {da(); da(); d(); d(); d();}<br /> else if (l == &#039;8&#039;) {da(); da(); da(); d(); d();}<br /> else if (l == &#039;9&#039;) {da(); da(); da(); da(); d();}<br /> else if (l == &#039;0&#039;) {da(); da(); da(); da(); da();}<br /> else if (l == &#039;.&#039;) {d(); da(); d(); da(); d(); da();}<br /> else if (l == &#039;,&#039;) {da(); da(); d(); d(); da(); da();}<br /> else if (l == &#039;?&#039;) {d(); d(); da(); da(); d(); d();}<br /> else if (l == &#039;\&#039;&#039;) {d(); da(); da(); da(); da(); d();}<br /> else if (l == &#039;!&#039;) {da(); d(); da(); d(); da(); da();}<br /> else if (l == &#039;/&#039;) {da(); d(); d(); da(); d();}<br /> else if (l == &#039;(&#039;) {da(); d(); da(); da(); d();}<br /> else if (l == &#039;)&#039;) {da(); d(); da(); da(); d(); da();}<br /> else if (l == &#039;&amp;&#039;) {d(); da(); d(); d(); d();}<br /> else if (l == &#039;:&#039;) {da(); da(); da(); d(); d();d();}<br /> else if (l == &#039;;&#039;) {da(); d(); da(); d(); da(); d();}<br /> else if (l == &#039;=&#039;) {da(); d(); d(); d(); da();}<br /> else if (l == &#039;+&#039;) {d(); da(); d(); da(); d();}<br /> else if (l == &#039;-&#039;) {da(); d(); d(); d(); d(); da();}<br /> else if (l == &#039;_&#039;) {d(); d(); da(); da(); d(); da();}<br /> else if (l == &#039;&quot;&#039;) {d(); da(); d(); d(); da(); d();}<br /> else if (l == &#039;$&#039;) {d(); d(); d(); da(); d(); d(); da();}<br /> else if (l == &#039;@&#039;) {d(); da(); da(); d(); da(); d();}<br /><br /> // Plus the two below equals a delay of 7 tempos for a space<br /> if (l == &#039; &#039;) {delay(5 * t);}<br /><br /> // Delay of 3 tempos, 2, plus the delay after a character<br /> delay(2 * t);<br /> <br />}<br /><br />// Loop through the message<br />void loop () {<br /><br /> // For each character in the message<br /> for (int g = 0; g &lt; sizeof(m); g++) {<br />  <br />   // Flash the morse equivalent for this letter<br />   morse(m[g]);<br />   <br /> }<br /> <br />}<br /></pre><br />The real challenge was in getting an entire book to fit on an Arduino. Most standard Arduino’s such as the Arduino Nano clones that I’m using have roughly 32K of storage space for holding programs. You get even less than this in reality since a typical bootloader for the Arduino takes .5K – 2K of the space before you even load your code on there. Even though the morse code flashing instructions I put together are relatively small, there was still not nearly enough space left to hold my favorite copy of the Tao Te Ching translated by Stephen Mitchell.<br /><br />His translation is around 37.32K and my original hope was that if I removed all the line breaks, and most of of the punctuation that I could get it to fit somehow. However, after adding in the additional code for flashing the LED and the bootloader, it became apparent that there was just no way this was going to work. I then pondered over it all for a couple of days.<br /><br />Compression is the natural solution to this problem. I was able to find a wonderfully up to date text compression utility called <a href="https://github.com/siara-cc/Shox96" >Shox96</a>. It is a hybrid entropy and dictionary encoder and the author has put together a great <a href="https://github.com/siara-cc/Shox96/blob/master/Shox96_Article_0_2_0.pdf" >white paper on the design</a> which is well worth reading. It also has a version which works great at compressing short strings into the Arduino program memory.<br /><br />After compressing Stephen Mitchell’s translation of the Tao Te Ching with Shox96 and then decompressing one chunk at a time and feeding that into my morse code flashing program it all worked perfectly. I had the entire book flashing before my eyes. <br /> <br />There was even plenty of free space left over. So I decided to make things a lot harder and use <a href="tao.txt" >this public domain translation</a> of the Tao Te Ching by John H. McDonald which is ~45.70K in size when not compressed. After compressing it… it did not fit on the Arduino anymore.<br /><br />I continued to poke at it and eventually realized that Shox96 encoding is more efficient when the lines of text are long. I then went through the full text manually and increased the line sizes to mostly be full sentences. Compressing this version got it all plenty small enough and I finally considered the project to be finished.<br /><br />I left the light blinking for many weeks running off of the USB port on the side of my office monitor. At the slow speed I set it at it takes longer than a day to run through the entire book, at this point it loops and starts from the beginning. I left serial debugging on, so if you monitor the serial output of the device you can watch it print each character to the screen as it flashes. This looked especially nice when paired with outputting to a CRT television. I ran it this way for many days as well. <br /> <br />This project helped me get quite a bit more familiar with Arduino’s and making use of additional libraries when working on sketches. The final flashing art piece also got me much better at sight-reading morse code which was a nice bonus.<br /> <br />The full code for this project is available <a href="morseTao/morseTao.tar.gz" >here</a>. Let me know if you can think of any other great books that would benefit from this sort of harassment.]]></summary>
		<updated>2019-08-31T21:44:57Z</updated>
	</entry>
	<entry>
		<title>Javascript Flasher Clock</title>
		<link href="http://spikesnell.com/index.php?entry=entry180325-111205" />
		<link rel="alternate" type="text/html" href="http://spikesnell.com/index.php?entry=entry180325-111205" />
		<link rel="edit" href="http://spikesnell.com/index.php?entry=entry180325-111205" />
		<id>http://spikesnell.com/index.php?entry=entry180325-111205</id>
		<summary type="html"><![CDATA[I have been using my minimalistic <a href="http://spikesnell.com/index.php?entry=entry170603-130807" >Pi Zero W flasher clock</a> for a while now and have found it to be an exceptionally soothing way to check on the current time. I recently ported the code over to work on the Pi 3 B+ and have edited my previous post about it to include both versions.<br /><br />The only trouble with this clock has been that the code for it is very specifically for a Raspberry Pi, and I have found myself wanting to have a flashing clock indicator like this on other devices like phones, televisions, etc. Clearly, the flasher clock I designed was in need of another port, so set of to re-create it in Javascript. <br /><br />It was a much more interesting challenge to get this working in Javascript than I expected it to be since Javascript is non-blocking and there is no built-in way to pause execution and sleep as you can with bash scripting. However, with some new features that most modern browsers take advantage of, Javascript is now capable of handling <a href="https://developers.google.com/web/fundamentals/primers/async-functions" >asynchronous functions</a> natively and can use the async/await keywords to sort of hold off on execution until a promise for the await returns. <br /><br />With async/await and promises, I was able to create a helper function to simulate a similar sleep behavior that my original script had without having to re-design everything to work as a weird sort of state machine using setTimeouts. This new code could have certainly be re-written to not use async/await but I believe it would be a lot less straightforward to make sense of that way. I was also able to take advantage of another ES6 addition, arrow functions, to streamline this custom wait function into the following one-liner:<br /><br /><b>var wait = t =&gt; new Promise(resolve =&gt; setTimeout(() =&gt; resolve(), t));</b><br /><br />This function, wait, takes a variable t which is the time in milliseconds that the setTimeout should wait until returning a promise. With this component in place I had everything I needed to finish up converting my original design into something that could run in any modern browser:<br /><br /><pre>&lt;html&gt;<br />&lt;head&gt;<br />&lt;title&gt;Javascript Flasher Clock&lt;/title&gt;<br /><br />&lt;script&gt;<br /><br />// Set up our colors array<br />const colors = [<br />    &#039;#FFFFFF&#039;,<br />    &#039;#FF0000&#039;,<br />    &#039;#FF8000&#039;,<br />    &#039;#FFFF00&#039;,<br />    &#039;#80FF00&#039;,<br />    &#039;#00FF00&#039;,<br />    &#039;#00FF80&#039;,<br />    &#039;#00FFFF&#039;,<br />    &#039;#0080FF&#039;,<br />    &#039;#0000FF&#039;,<br />    &#039;#7F00FF&#039;,<br />    &#039;#FF00FF&#039;,<br />    &#039;#FF007F&#039;<br />];<br /><br />// Set up our default color index<br />var c = 0;<br /><br />// Set up our base wait time<br />var w = 50;<br /><br />// Define the wait function, a promise that waits for a setTimeout of length t before returning<br />var wait = t =&gt; new Promise(resolve =&gt; setTimeout(() =&gt; resolve(), t));<br /><br />// A function to change the color<br />function changeColor() {<br /><br />    // If we are at the end of the colors array set c back to the first value<br />    if ( c === colors.length - 1) {<br /><br />        // Set c back to the first color<br />        c = 0;<br /><br />    }<br /><br />    // Else we just need to increment our color value c<br />    else {<br /><br />        // Increment c<br />        c++;<br /><br />    }<br /><br />}<br /><br />// Define our clock function using async so that we can use await<br />async function clock() {<br /><br />    // Set the default background color to black at the beginning of each cycle<br />    document.body.style.background = &#039;#000000&#039;;<br /><br />    // Wait for a long while so that we separate our flasher clock cycles<br />    await wait(w * 40);<br /><br />    // Get the current date<br />    let date = new Date();<br /><br />    // Get the current number of hours<br />    let hours = ((date.getHours() + 11) % 12 + 1);<br /><br />    // Get the current number of tens digits<br />    let tensDigits = (date.getMinutes() &lt; 10 ? &#039;0&#039; : &#039;&#039; + date.getMinutes()).substring(1,0);<br /><br />    // Flash the current number of hours<br />    for (let h = 0; h &lt; hours; h++) {<br /><br />        // Wait a while<br />        await wait(w*8);<br /><br />        // Set the screen to the colors c value<br />        document.body.style.background = colors[c];<br /><br />        // Wait another while<br />        await wait(w*8);<br /><br />        // Set the screen back to black<br />        document.body.style.background = &#039;#000000&#039;;<br /><br />    }<br /><br />    // Wait a medium while between the hours and tens digits flashes<br />    await wait(w*20);<br /><br />    // Flash for the current number of tens digits<br />    for (let t = 0; t &lt; tensDigits; t++) {<br /><br />        // Wait a little while<br />        await wait(w*5);<br /><br />        // Set the screen to the colors c value<br />        document.body.style.background = colors[c];<br /><br />        // Wait another little while<br />        await wait(w*5);<br /><br />        // Set the screen back to black<br />        document.body.style.background = &#039;#000000&#039;;<br /><br />    }<br /><br />    // Call this clock function again to start a new cycle<br />    clock();<br /><br />}<br />&lt;/script&gt;<br /><br />&lt;/head&gt;<br />&lt;body onload=&#039;clock()&#039; onclick=&#039;changeColor()&#039;&gt;<br />&lt;/body&gt;<br />&lt;/html&gt;</pre><br />I also added the capability to click anywhere on the screen to cycle through many different color codes so that the one can switch up the display color of the flash easily even if using a phone.<br /><br />As with the original design, the clock flashes for the current number of hours ( in 12-hour format ) and then flashes a little more quickly once for every current tens digit of minutes.  For example, if the time is 6:38 the clock will flash 6 times somewhat slowly, and then three times somewhat faster. I decided that the clock should be in 12-hour format in order to cut down on the number of flashes one would potentially have to watch in each cycle. Similarly, I have foregone the full number of minutes to cut down on the number of flashes one would have to count. Staying within ten minutes of accuracy seems like a good compromise between the time necessary to read the clock and precision to me. <br /><br /><a href="http://www.spikesnell.com/flasher" >The Javascript Flasher Clock can be experienced here.</a><br /><br />I&#039;m very happy with the results. It was great to finally make use some of the newest additions to Javascript. These new features made it possible for me to rewrite my original script much more easily than I had originally imagined. <br /><br />My plan is to shine a phone running this clock at a wall so that the whole wall is a time indicator, but I&#039;m also interested in lighting up translucent objects so that the object itself can be the time indicator. A milk jug should work great for that, although it may look classier inside of a paper lantern. <br /><br />-- Addendum, March 26 2018<br /><br />I have found a nice opaque white container that diffuses a phones display well and have placed it in the middle of my indoor sand garden. The phone is able to remain charged by keeping it plugged in with a hole for the cord I made in the back of the container. It then struck me that I had no way to change the light color or intensity once everything was assembled in the jar, but this was easily solved by adding <a href="https://play.google.com/store/apps/details?id=com.teamviewer.host.market&amp;hl=en" >Teamviewer Host</a> to the phone and the remotely controlling phone from another device to change the display brightness or cycle through color options. ]]></summary>
		<updated>2018-03-25T15:12:05Z</updated>
	</entry>
	<entry>
		<title>Easy Raspberry Pi GPIO Pin Control with Bash</title>
		<link href="http://spikesnell.com/index.php?entry=entry170708-163739" />
		<link rel="alternate" type="text/html" href="http://spikesnell.com/index.php?entry=entry170708-163739" />
		<link rel="edit" href="http://spikesnell.com/index.php?entry=entry170708-163739" />
		<id>http://spikesnell.com/index.php?entry=entry170708-163739</id>
		<summary type="html"><![CDATA[I have been experimenting a bit with home automation lately by hooking up some small electrical relays to my Raspberry Pis. So far I have my bedroom fan and a small lamp fully under remote control and connected to my home network.  I even have them under voice control now by using an app called <a href="http://tasker.dinglisch.net/" >Tasker</a> on Android, as well as two helper plugin apps for Tasker called Autovoice and an associated SSH Plugin. I feel an undeniable sense of power whenever I verbally tell my phone to turn my lamp or fan on or off, and it has quickly become a much more natural and pleasant feature of my bedroom over the last few days. <br /><br />In the past, I have always used Python and a GPIO control library to control the output pins on a Raspberry Pi. This method requires installing both Python and the pin control library on a fresh Raspbian or Retropie install, which can be a bit of a nuisance.<br /><br />Since the release of the first Raspberry Pi I&#039;ve been wanting a simple solution to just turn Raspberry Pi pins on or off without having to install any additional software or remember any commands.  I&#039;ve also loved bash scripting for a long time now, and while putting together my last minimal Pi Zero clock project I realized that a pi&#039;s output pins can be fully controlled by writing to system files without the need of installing Python or anything else. For example, to turn on pin 26 on a Raspberry Pi one can simply enter these three short commands:<br /><br /><pre>sudo echo &quot;26&quot; &gt; /sys/class/gpio/export<br />sudo echo &quot;out&quot; &gt; /sys/class/gpio/gpio26/direction<br />sudo echo &quot;1&quot; &gt; /sys/class/gpio/gpio26/value</pre><br />Turning the pin off is as easy as echoing a value of 0 to the pin&#039;s value in the same location as the last line. <br /><br />I first created a number of small scripts to turn certain pins on, and another script to turn the same pin off and was using that with my home automation system. After a couple of days, I decided that I&#039;d like to have a script to toggle the state of any arbitrary pin. This is so that I can issue the same command to turn my lamp on or off without having to be specific about what I want when I yell at the phone. I also wanted this script to be able to specifically turn a pin on or off in the case that I&#039;m not at home and want to make sure something is turned on or off even if I don&#039;t recall whether I left it on or not. I quickly came up with the following bash code that accomplishes just that:<br /><br /><pre>#!/bin/bash<br /># A utility script to toggle a raspberry pi gpio pin on or off<br /># Spike Snell - July 2017<br /><br /># If there are command line options to use<br />if [ $# != 0 ]<br />then<br /><br />    # Set up our argument variables<br />    arg1=&quot;$1&quot;<br />    arg2=&quot;$2&quot;<br /><br />    # If the gpio pin was not previously set up<br />    if [ ! -e /sys/class/gpio/gpio&quot;$arg1&quot; ];<br />    then<br />        # Make sure that gpio pin $arg1 is initialized<br />        echo &quot;Initializing gpio pin&quot; $arg1<br />        echo &quot;$arg1&quot; &gt; /sys/class/gpio/export<br />        echo &quot;out&quot; &gt; /sys/class/gpio/gpio&quot;$arg1&quot;/direction<br />    fi<br /><br />    # Check to see if there was a second command line argument<br />    if [ -z &quot;$2&quot; ]<br />        # Argument 2 for the on/off value was not set<br />        # We should just toggle the current state of gpio pin $arg1<br />        then<br />             # If the current value is 1 set it to 0 and vice versa<br />             if grep -q 1 /sys/class/gpio/gpio$arg1/value<br />             then<br />                echo &quot;Toggling gpio pin&quot; $arg1 &quot;to 0&quot;  <br />                echo &quot;0&quot; &gt; /sys/class/gpio/gpio&quot;$arg1&quot;/value<br />             else<br />                echo &quot;Toggling gpio pin&quot; $arg1 &quot;to 1&quot;<br />                echo &quot;1&quot; &gt; /sys/class/gpio/gpio&quot;$arg1&quot;/value<br />             fi<br />        # Argument 2 for the on/off value was set<br />        # We should set gpio pin $arg1 to the value of $arg2<br />        else<br />             echo &quot;Setting gpio pin&quot; $arg1 &quot;to&quot; $arg2<br />             echo &quot;$arg2&quot; &gt; /sys/class/gpio/gpio&quot;$arg1&quot;/value<br />        fi<br /><br /># Else there were no options passed in, let the user know about them<br />else<br />    echo &quot;Please enter what pin to toggle, ex: sudo ./pin.sh 11&quot;<br />    echo &quot;Optionally enter if the pin should be 1 or 0, ex: sudo ./pin.sh 11 0&quot;<br />    echo &quot; * Make sure to run as super user &quot;<br />fi</pre><br />I included some helpful information near the bottom that gets displayed if the script is called without any parameters.  To use it the script should be saved as pin.sh and set to be executable with the command sudo chmod +x pin.sh.<br /><br />I plan to use this script quite a lot in the future and this seems a good place to keep a copy of it. Hopefully this can be helpful to others as well. Feel free to leave any comments or suggestions that you may have.]]></summary>
		<updated>2017-07-08T20:37:39Z</updated>
	</entry>
	<entry>
		<title>Minimalist Single LED Clock ( Pi Zero and No Extra Parts )</title>
		<link href="http://spikesnell.com/index.php?entry=entry170603-130807" />
		<link rel="alternate" type="text/html" href="http://spikesnell.com/index.php?entry=entry170603-130807" />
		<link rel="edit" href="http://spikesnell.com/index.php?entry=entry170603-130807" />
		<id>http://spikesnell.com/index.php?entry=entry170603-130807</id>
		<summary type="html"><![CDATA[<img src="http://i.imgur.com/sSo3rFh.gif" width="320" height="230" alt="" /><br /><br />I was inspired by <a href="http://hackaday.com/2016/07/29/a-one-led-clock" >this post</a> on Hackaday where Setvir created an elegant single LED clock using an Arduino Pro Micro. I&#039;m more of a fan of Raspberry Pi&#039;s and have been wanting to come up with a simple single LED clock design of my own ever since reading that article.<br /><br />It occurred to me today that the Pi Zero&#039;s status light could be commandeered for this purpose which would eliminate the need for any other additional parts. I considered using Python for this but eventually decided upon using bash scripting as it is already baked in to most common Pi Zero images such as Raspbian or Retropie. <br /><br />The heavily commented code below is what I came up with to bring this clock design to life:<br /><br /><pre>#!/bin/bash<br /># A minimalist led clock for the Pi Zero ( And Pi Zero W )<br /># Uses only the onboard led to blink the current hour<br /># And then to quickly blink the the tens place of minutes<br />#<br /># Spike Snell - June 2017<br /><br /># First set the trigger for the onboard green led to none so that we have control of it<br />echo none | sudo tee /sys/class/leds/led0/trigger<br /><br /># Turn off the led so that we have a known state to start<br />echo 1 | sudo tee /sys/class/leds/led0/brightness<br /><br /># Loop endlessly<br />while true<br />do<br /><br />    # Wait for a full second to seperate our visual count<br />    sleep 1<br /><br />    # Loop for the current number of hours<br />    # Trim leading 0&#039;s so that 08 and 09 aren&#039;t interpreted as an octal base<br />    for ((n=0;n&lt;$(date +&quot;%I&quot; | sed &#039;s/^0*//&#039;);n++)) <br /><br />    do<br /><br />        # Wait a bit <br />        sleep .25<br /><br />        # Turn the led on<br />        echo 0 | sudo tee /sys/class/leds/led0/brightness<br /><br />        # Wait a bit<br />        sleep .25<br /><br />        # Turn the led off<br />        echo 1 | sudo tee /sys/class/leds/led0/brightness<br />   <br />    done<br /><br />    # Wait for a half second<br />    sleep .5<br /><br />    # Now loop very quickly for the current first tens digit of minutes<br />    for ((n=0;n&lt;$(date +&quot;%M&quot; | head -c 1);n++))<br /><br />    do <br /><br />        # Wait for a small bit<br />        sleep .1<br /><br />        # Turn the led on<br />        echo 0 | sudo tee /sys/class/leds/led0/brightness<br /><br />        # Wait for a small bit<br />        sleep .1<br /><br />        # Turn the led off<br />        echo 1 | sudo tee /sys/class/leds/led0/brightness<br /><br />    done<br /><br />done</pre><br />I saved the script in my home directory as minimalistClock.sh and made it executable with the command <strong>chmod +x minimalClock.sh</strong>. It is then run under its own screen with the command <strong>screen ./minimalClock.sh</strong> since it can be somewhat distracting if running on your main session due to all the echo commands. Screen is also a very handy way to make the clock persist and keep running even after logging out of your current session. Use the command <strong>sudo apt-get install screen</strong> if you don&#039;t already have it installed. After getting the clock up and running in screen you can press <strong>ctrl+a</strong> then <strong>ctrl+d</strong> to detach the screen and have it keep running in the background.<br /><br />The clock is read by counting the number of long blinks to get the hours, and then the number of short blinks to get the tenth place of minutes. For example, 4 longer blinks followed by 3 shorter blinks indicates that the current time is about 4:30. I decided not to use a 24 hour military format for this because that would end up being far too many blinks when late in the day.<br /><br />This script can be easily added to /etc/rc.local so that it will begin running when the Pi starts up. <br /><br />This is exactly the minimalistic clock that I have been desiring for so long and it looks great running in my translucent <a href="https://www.instructables.com/id/Pi-Zero-W-Tic-Tac-Case/" >Pi Zero Tic Tac Case</a> which I have attached to the wall. Let me know what you all think of this basic clock design. If it could be made even simpler in some way I would love to experiment with that.<br /><br />-- Edit March 2018<br /><br />I have edited the code slighty in order for it to work on a Raspberry Pi 3 B+ ( Probably the non-plus version as well ).<br /><br />Same idea as before, but this time using the onboard status led on the back of the bigger Pi. For some reason the light/dark values all had to be reversed, but other than that the code is the same. I found that putting a piece of electrical tape over the red led ( Which is always on when the Pi is receiving power ) makes the clock a lot more pleasant to leave on.<br /><br /><pre>#!/bin/bash<br /># A minimalist led clock for the Pi 3 B+<br /># Uses only the onboard green led to blink the current hour<br /># And then to quickly blink the the tens place of minutes<br />#<br /># Spike Snell - March 2018<br /><br /># First set the trigger for the onboard green led to none so that we have control of it<br />echo none | sudo tee /sys/class/leds/led0/trigger<br /><br /># Turn off the led so that we have a known state to start<br />echo 0 | sudo tee /sys/class/leds/led0/brightness<br /><br /># Loop endlessly<br />while true<br />do<br /><br />    # Wait for a full second to seperate our visual count<br />    sleep 1<br /><br />    # Loop for the current number of hours<br />    # Trim leading 0&#039;s so that 08 and 09 aren&#039;t interpreted as an octal base<br />    for ((n=0;n&lt;$(date +&quot;%I&quot; | sed &#039;s/^0*//&#039;);n++)) <br /><br />    do<br /><br />        # Wait a bit <br />        sleep .25<br /><br />        # Turn the led on<br />        echo 1 | sudo tee /sys/class/leds/led0/brightness<br /><br />        # Wait a bit<br />        sleep .25<br /><br />        # Turn the led off<br />        echo 0 | sudo tee /sys/class/leds/led0/brightness<br />   <br />    done<br /><br />    # Wait for a half second<br />    sleep .5<br /><br />    # Now loop very quickly for the current first tens digit of minutes<br />    for ((n=0;n&lt;$(date +&quot;%M&quot; | head -c 1);n++))<br /><br />    do <br /><br />        # Wait for a small bit<br />        sleep .2<br /><br />        # Turn the led on<br />        echo 1 | sudo tee /sys/class/leds/led0/brightness<br /><br />        # Wait for a small bit<br />        sleep .2<br /><br />        # Turn the led off<br />        echo 0 | sudo tee /sys/class/leds/led0/brightness<br /><br />    done<br /><br />done<br /></pre>]]></summary>
		<updated>2017-06-03T17:08:07Z</updated>
	</entry>
	<entry>
		<title>Raspberry Pi Zero W Tic Tac Case</title>
		<link href="http://spikesnell.com/index.php?entry=entry170528-120232" />
		<link rel="alternate" type="text/html" href="http://spikesnell.com/index.php?entry=entry170528-120232" />
		<link rel="edit" href="http://spikesnell.com/index.php?entry=entry170528-120232" />
		<id>http://spikesnell.com/index.php?entry=entry170528-120232</id>
		<summary type="html"><![CDATA[I have created a very simple Raspberry Pi Zero W case using a Tic Tac container. I considered putting the full instructions here but decided that <a href="https://www.instructables.com/" >Instructables</a> would be the best platform for it to get mass exposure and the best search engine indexing. The plans have been released into the public domain.<br /><br /><a href="https://www.instructables.com/id/Pi-Zero-W-Tic-Tac-Case/" >Check out the 5 simple steps to make my super low cost Pi Zero W case here.</a><br /><br /><a href="https://www.instructables.com/id/Pi-Zero-W-Tic-Tac-Case/" ><img src="images/FP2601ZJ30T1VRZ.MEDIUM_(1).jpg" width="480" height="290" alt="" id="img_float_left" /></a>]]></summary>
		<updated>2017-05-28T16:02:32Z</updated>
	</entry>
	<entry>
		<title>Raspberry Pi + Atari 2600 Case</title>
		<link href="http://spikesnell.com/index.php?entry=entry170307-194900" />
		<link rel="alternate" type="text/html" href="http://spikesnell.com/index.php?entry=entry170307-194900" />
		<link rel="edit" href="http://spikesnell.com/index.php?entry=entry170307-194900" />
		<id>http://spikesnell.com/index.php?entry=entry170307-194900</id>
		<summary type="html"><![CDATA[I&#039;ve recently finished putting together a custom Raspberry Pi case using the shell of an old Atari 2600. This isn&#039;t so much a how-to but more of a general overview of what was involved. It is all a lot simpler to accomplish than one might imagine. <br /><br />What gave me the idea for this project was that I had an old Vader style Atari 2600 with a number of hardware issues rendering it unusable. I&#039;ve also been emulating thousands of old games on a Raspberry Pi 3 with <a href="https://retropie.org.uk/" >Retropie</a> lately but had never had a case for the Pi that was much to look at. I had been considering buying one of those little 3d printed cases which look like an original Nintendo Entertainment System which are aesthetically impressive but the price point always seemed a little silly considering the Pi itself is so inexpensive.<br /><br />The first step for this project was to completely remove all the innards from the old Atari. There was a lot more space in here than I expected so I knew straight off it wouldn&#039;t be a challenge at all to fit everything needed inside of the case.<br /><br /><a href="javascript:openpopup('http://www.spikesnell.com/images/pi2600/0.jpg',800,892,false);"><img src="http://www.spikesnell.com/images/pi2600/0.jpg" width="480" height="535" alt="" /></a><br /><br />The second step was to rip off all of the old switches and glue them down to the case plastic itself. I swapped the power switch out for the reset switch so that I could wire it up to the Pi later and use it to turn the system on and off. Below is a closeup of where I soldered wires on to the switch and then covered whole are with hot glue ( being careful not to effect the mechanism itself ):<br /><br /><a href="javascript:openpopup('http://www.spikesnell.com/images/pi2600/1.jpg',800,450,false);"><img src="http://www.spikesnell.com/images/pi2600/1.jpg" width="480" height="270" alt="" /></a><br /><br />The other end of this switch is connected to pins 5 and 6 of the pi&#039;s GPIO. These trigger the Pi to turn on if it has power but has been shutdown, they also double as an input which can trigger a safe shutdown of the system. I first saw how straightforward this was to set up on <a href="https://www.youtube.com/watch?v=4nTuzIY0i3k" >this video</a> by ETA PRIME. He details how to set this all up and includes all the steps needed in a text file. Basically it involves making sure that you have python on the system and a library allowing you easy access to the GPIO pins. A script is then initiated whenever the system starts up which constantly watches for pins 5 and 6 being momentarily connected which then sets off a <strong>shutdown -h</strong> command when that occurs. Shutting the pi down in this way is much preferable to pulling the power to it since powering off suddenly at just the wrong moment can often lead to corruption of the sd card which the Pi runs itself off of. <br /><br />Next up I piled everything into the belly of the large Atari case. I was able to add in an extra controller, spare A/V cable, and the Pi itself. Luckily all of the desired cords were able to be fed in through the controller port holes left in the back of the case. The HDMI head was a bit of a tight fit but I managed to get it through without any modification:<br /><br /><a href="javascript:openpopup('http://www.spikesnell.com/images/pi2600/3.jpg',800,474,false);"><img src="http://www.spikesnell.com/images/pi2600/3.jpg" width="480" height="284" alt="" /></a><br /><br />One of the final touches was to do a little modification of the logo on the front of the Atari after I realized that I could turn the capital R at the end of Atari into a fair approximation of the letter P:<br /><br /><a href="javascript:openpopup('http://www.spikesnell.com/images/pi2600/4.jpg',800,401,false);"><img src="http://www.spikesnell.com/images/pi2600/4.jpg" width="480" height="241" alt="" /></a><br /><br />I decided to not screw everything back together because the top shell fits on very snugly and sits firmly in place. I also like being able to open the case up easily so that I can get to the spare controller that I&#039;ve stored inside. Things were looking a bit odd when I had a hole open where the games used to fit in the system. I decided to put a Bowling cartridge in the empty space which is not ideal for ventilation considerations but hasn&#039;t caused any problems so far.<br /><br />Finally a shot of the entire case with my favorite controller on top ( <a href="https://www.amazon.com/Buffalo-Classic-USB-Gamepad-PC/dp/B002B9XB0E" >Buffalo SNES</a> ) :<br /><br /><a href="javascript:openpopup('http://www.spikesnell.com/images/pi2600/5.jpg',800,478,false);"><img src="http://www.spikesnell.com/images/pi2600/5.jpg" width="480" height="287" alt="" /></a><br /><br />It certainly isn&#039;t the most complex build out there but I am very pleased with it. It has been a lot more satisfying to have this classic Atari design beside the TV while I play old retro games compared to just hiding the Pi out of sight like I used to.<br /><br />It would be a shame to dismantle a working Atari for this purpose but if you have a broken one, or can find one being sold which needs more repair than it is worth, I&#039;d highly recommend re-purposing it in this way.]]></summary>
		<updated>2017-03-08T00:49:00Z</updated>
	</entry>
	<entry>
		<title>A Small Image Catastrophe</title>
		<link href="http://spikesnell.com/index.php?entry=entry151203-175536" />
		<link rel="alternate" type="text/html" href="http://spikesnell.com/index.php?entry=entry151203-175536" />
		<link rel="edit" href="http://spikesnell.com/index.php?entry=entry151203-175536" />
		<id>http://spikesnell.com/index.php?entry=entry151203-175536</id>
		<summary type="html"><![CDATA[Unfortunately the image host I was using, minus.com, is having some severe difficulty and most of the images I had hosted there for this blog are unavailable due to a technical problem.<br /><br />I&#039;m hoping that they come back up as they were my primary backups of these images. For now I have replaced the images with the words &quot;Image Removed&quot; so some imagination will be required before I get everything back in order.<br /><br />It should be a great lesson for me to limit the points of failure in any system. If minus.com does come back up or if I am able to find good cached copies of them they will be put back in place as I have a log file of where each image should be. ]]></summary>
		<updated>2015-12-03T22:55:36Z</updated>
	</entry>
	<entry>
		<title>How to Make: Floating Ping Pong Ball LED Light Orbs</title>
		<link href="http://spikesnell.com/index.php?entry=entry150822-101612" />
		<link rel="alternate" type="text/html" href="http://spikesnell.com/index.php?entry=entry150822-101612" />
		<link rel="edit" href="http://spikesnell.com/index.php?entry=entry150822-101612" />
		<id>http://spikesnell.com/index.php?entry=entry150822-101612</id>
		<summary type="html"><![CDATA[These little lights are great for floating in the bath, a pool, or just setting in your guests drinks for a little extra style at a party.<br /><br />Base materials:<br /><br />- Ping pong balls <br />- LED lights ( Look for ones driven well at ~3 volts )<br />- CR2032 3V/20mAh buttoncell batteries ( Or any small battery that will drive your LED well )<br /><br />Image Removed<br /><br />And for constructing them:<br /><br />- A box cutter<br />- Opaque office tape ( for diffusing the light )<br /><br />Image Removed<br /><br />- A hot glue gun with hot glue sticks<br /><br />Image Removed<br /><br />To begin you will want to bend the legs of your LED light such that they loop back on themselves snugly and place battery in-between the legs such that the light turns on. You will want a battery that drives your LED well without burning it out at full power and with enough amperage to last for a while. My favorite choice for the LED&#039;s I found were CR2032 buttoncells ( both found on Ebay ). <br /><br />Image Removed<br /><br />After you get the LED shining brightly on the battery take your office tape and wrap it snugly around the battery to hold the wire legs in place so that they won&#039;t slip off.<br /><br />Image Removed<br /><br />Now take a lot more tape and wrap it around the whole battery and LED. Pay special attention to go around the light a number of times and make it as puffy as possible. The idea here is to use the tape to start diffusing the light so that you won&#039;t end up with glaring light spots inside the finished orb. The tape should spread out the light giving you a small lumpy mass looking something like this.<br /><br />Image Removed<br /><br />Next you will want to carefully take your box cutter to make an incision in the ping pong ball just wide enough to fit the LED and battery to fit inside. Stuff it all in there and work on getting the ball back to its original shape in-case you have dented it any during the operation.<br /><br />Image Removed<br /><br />Work on getting the incision in the ping pong ball to be flush with itself again and hold it in place with one hand while using your other hand to hot glue the seam together. To get this seal less globular place some more office tape over the patch to make it push more closely to the ball. Be careful not to damage your fingers on the hot glue if you decide to press it down with tape. The idea here is to completely cover the incision and hold the ball together in a watertight package.<br /><br />Once the hot glue has finished cooling clean up the area a bit with the box cutter if necessary and take off any tape if you decided to push the glue down close to the ball that way.<br /><br />Image Removed<br /><br />You&#039;ve done it! You now have a glowing watertight ping pong ball orb to use in any way you see fit. My favorite thing to do with them is to bring them into the bath for some relaxing mood lighting. They also work quite well as drink markers at a party ( each person can have their own color ). I also found them quite fun to just toss around or set in a bowl.<br /><br />Image Removed<br /><br />Depending on what LED light and battery you used they should last for quite a while. Mine went for a few days before getting so dim that I took them apart and salvaged the LED.<br />]]></summary>
		<updated>2015-08-22T14:16:12Z</updated>
	</entry>
</feed>
